
*This post may contain affiliate links. This means we may make a commission if you purchase an item using one of our links*
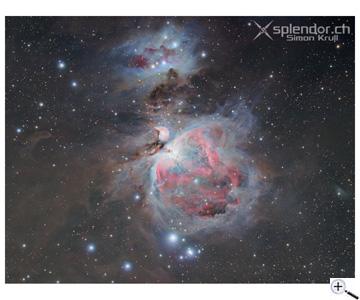
We’ve all seen awe inspiring imagery of star clusters, galaxies, planets, in fact I know that some of you reading this right now have a galaxy, a planet or a star cluster as a screen saver right now!
Although that’s not too important a thing, the fact you may have one is indicative of your interest in astronomy and you being on this page right now makes it pretty clear that you’re interested in taking some pictures of your own to spice up your gallery.
Okay… maybe I’m thinking too far ahead but you can’t tell me this isn’t a thought that’s crossed your mind.
If taking great photos of celestial objects of space is something you want to do, then you’ve found yourself in the right place because this page is (as I’m sure you know considering you clicked on it) a list of the 13 best telescopes for astrophotography, at all prices of course, that’ll help you in capturing your very own images of outer space (along with a little guide)
In A Hurry? Check Out Our 3 Best Picks Below!
Table of Contents

What Are The Basic Things You’ll Need In Order To Get Started With Astrophotography?
There are 2 main things you’ll need. The first thing the telescope and the second thing is the camera but, there’s more to it than just these 2 aspects. Some other things you’ll also need to consider picking up include the following :
- A diagonal for visual observation and mount alignment
- A finderscope with brackets for visual observation and autoguiding implementation
- Tube rings and a dovetail bar, or an integrated dovetail for mounting
- A carrying case to protect the telescope during travel and storage
- A field flattener/reducer to create a flat field for imaging
Obviously taking photographs in general is a lot more complex than normal folks would believe, which is why there are a lot of other components you will need to consider buying if you’re getting into astrophotography.
Of course it’s not absolutely necessary that you buy them right away but, they will prove to be useful in the long term so, definitely think about getting them at the same time or a few months after you’ve purchased the telescope.
Aperture Isn’t King For An Astrophotography System
One major thing that you should know is that systems that are primarily designed to take images of deep space tend not to have the highest of apertures. In fact you could take amazing imagery with just a 50mm scope and some great ones have been captured through the smaller lenses over the years.
The difference between a scope that’s designed to observe and one that’s designed for taking photos is that the focal ratio is more important in an astrophotography telescope than a normal one. This is because focal ratio rules this sector of telescopes which is primarily due to the speed at which a lens captures light from deep space is more important than the detail it showcases.
As space is so dim, the signal to noise ratio (SNR) which measures the speed at which photons are captured, must ideally be very high. The more photons you capture in a photo will equal to an increase in the SNR which in turn will provide a much smoother image, which is the ultimate goal.
Therefore, what you want to do is expose the image you want to capture for as long as possible to gather as much light as possible, whilst being in an environment with minimal light pollution to reduce noise.
The fact of the matter is that noise will inevitably increase when you increase the signal but, that’s just how it is when it comes to taking the best photos. Image processing and the exposure of the image also plays a part in how well your picture turn out.
Hopefully this clears up a few things. Anyway, let’s move onto the telescopes. This list below is comprised of the 13 Best telescopes that I could find, in no particular order, so you have a rough idea on where you should start in your astrophotography journey.
13 Best Telescopes For Astrophotography
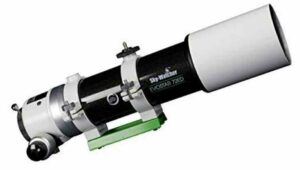
1. Sky-Watcher Evoguide 72 (Best Pick For Beginners)
Pros :
- Provides a stable and crisp image
- The tube is very lightweight
- Low maintenance
- Quite affordable entry level astrophotography kit
Cons :
- No eyepieces included in the box
- No mount provided
- Suffers chromatic aberration
The Evoguide 72 is great telescope for astrophotography with it’s sturdy build due to the refractor optics and design and it’s relatively affordable pricing at around $350 – $400.
The specs of the scope may not seem all that impressive when you consider the spec list of a 72mm aperture, 420mm focal length and a f/5.8 ratio but, due to the short focal length, the field of view is very wide meaning you’ll be able to capture some great images of star clusters and possibly even nearby galaxies.
The theoretical max magnification of this device is only at 213x but, at this magnifications you’ll still be able to capture some nice images of a few planets and of course the moon will be pretty crisp through the lens.
However, although the refractor design is sturdy and doesn’t require you to maintain or align the mirrors all too often, it still does mean that the Evoguide will have a bit of distortion and chromatic aberration which may make some photos to not be the most accurate in terms of colours.
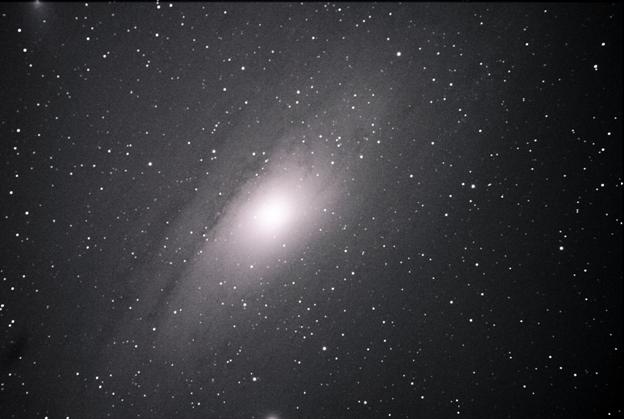
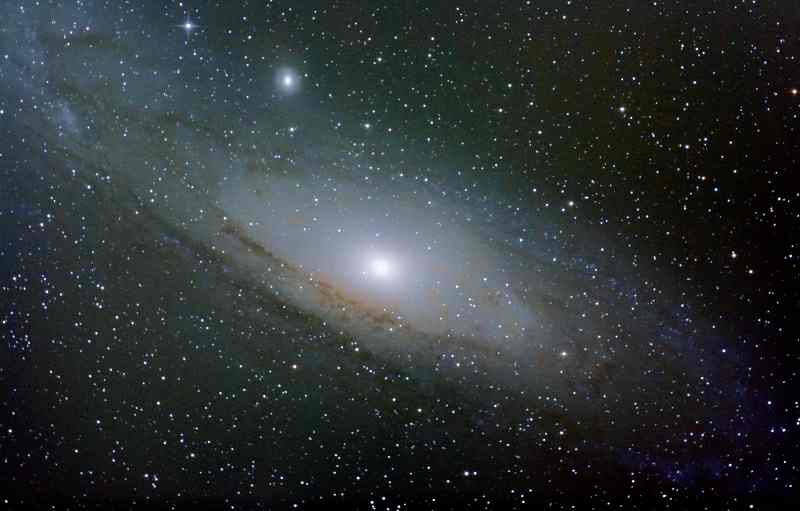
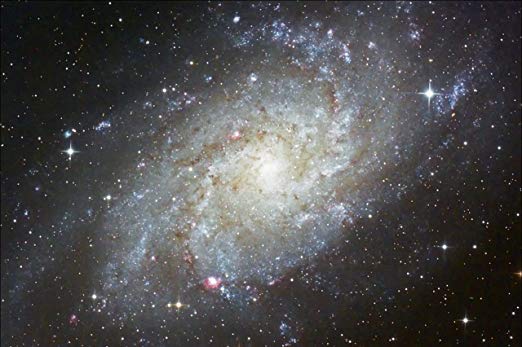
Nevertheless, taking images of the andromeda galaxy and Triangulam galaxy should look pretty great with this scope and at the asking price, and I’d say it’s a fair deal
As for the accessories included in the box you don’t really get any thing besides a 2″ dual speed Crayford focuser.
To make the most out of the scope and maximise the performance of the images by shooting at areas with little to no light pollution, you will need to purchase a lot of things such as a mount to keep the scope sturdy, a few eyepieces for viewing different celestial objects and of course a great DSLR camera to take photos with.
Nevertheless, at around the $400 mark, the Evoguide 72 is a great device, fairly portable weighing in at around 3kg’s with the dimensions of the tube only being 42cm in length and just an all round great device for beginner astrophotographers.
Click Here To Check The Evoguide 72’s Best Price On Amazon!
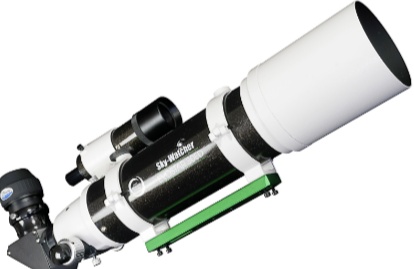
2. Skywatcher Evostar-80ED DS-PRO Apochromatic Refractor 80mm (Best Overall Pick)
Pros :
- High quality APO refractor optics
- Great at taking detailed images
- Narrower field of view makes it a good pick for taking planetary images
- Lightweight and portable
Cons :
- No Included mount
- The power isn’t the greatest
- It’s quite pricey
The SkyWatcher Evostar 80ED is another great astrophotography telescope that’s once again refractor based system. This scope is more expensive than the one above and will set you back in the region of $550 – $650.
Like the Evoguide, the Evostar is also a refractor based scope so it has the benefits of one such as a sturdy build, meaning minimal maintenance and need for realignment, and a lightweight design.
Unlike the Evoguide above, the Evostar uses Apochromatic (APO) refractor lens which corrects most issue regarding chromatic aberration. This doesn’t mean that there will be no chromatic aberration at all but, it most certainly won’t be a bother.
The specs of the Evostar 80ED is a 80mm aperture 600mm focal length which leaves you with a focal ratio of f/7.5. Once again unlike a scope that’s designed to physically observe deep space objects, the Evostar does fall short however, astrophotography scopes aren’t necessarily designed to view celestial objects so much as they’re designed to take images.
Nevertheless, if you want to take images of planets, you will be able to with the 80ED due to its max theoretical magnification of 157x.
The accessories included in the box are a 2”/50.8mm Di-Electric Star Diagonal, 9×50 Finderscope, a 2″ 28mm (21x) LES eyepiece and a Dual-Speed 11:1 2” Crayford Focuser.
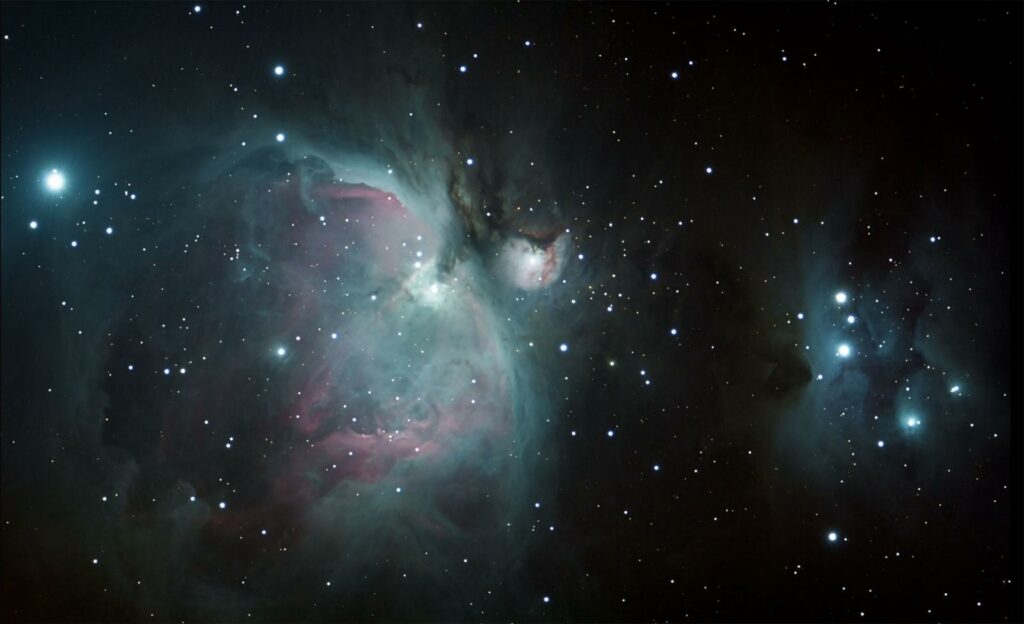
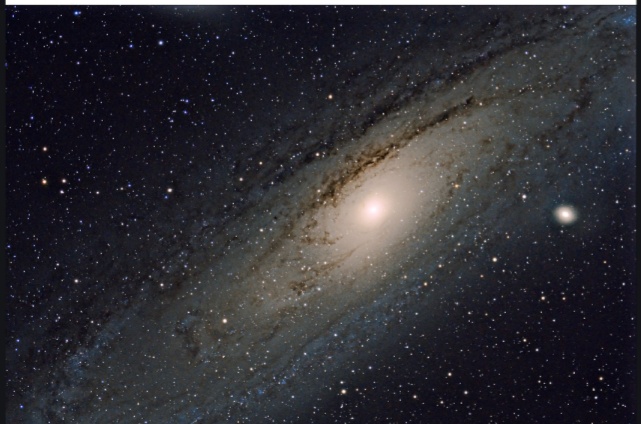
The Evostar weighs in at 4.1kg so it’s very light and the dimensions at 75 x 39 x 28 cm make a it a very portable scope too. As for the pictures it can take I’ll show a few examples down below
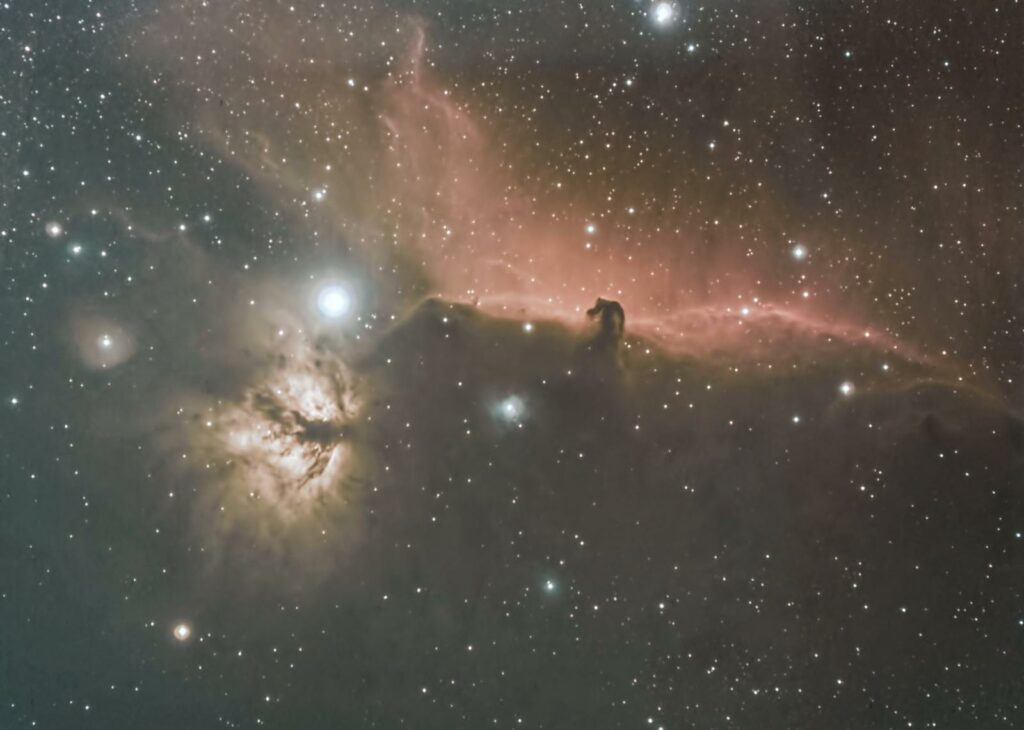
Most who’ve used this scope have found it to be very good, even outperforming the quality of telescopes with much larger lenses scopes. Nevertheless, if you’re looking for a decently priced high quality astrophotography telescope, the Evostar 80ED definitely isn’t a bad shout.
Click Here To Check The Evostar 80ED’s Best Price On Amazon!
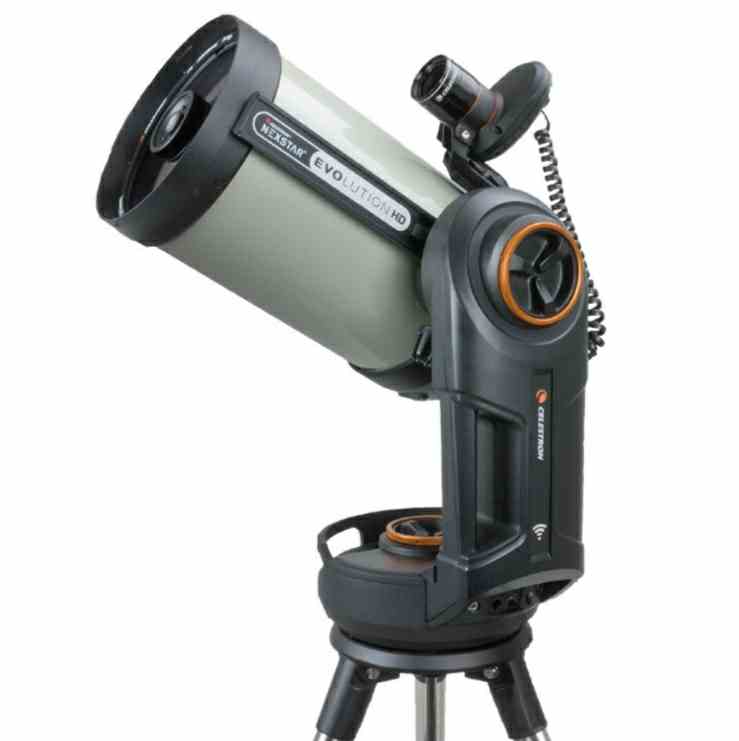
3. Celestron Nexstar Evolution 8
Pros :
- Great Rechargeable GoTo Mount
- Solid optical specs
- Minimal maintenance needed
- Can take good images despite not being specifically designed for astrophotography
- Great for viewing planets and distant planets
- Great inbox accessories provided
Cons :
- Not designed specifically for astrophotography
- Quite expensive
- Quite heavy
The nexstar evolution 8 is a great GoTo telescope with a sturdy structure and powerful optics too. The telescope utilises a Schmidt-Cassegrain (SCT) optical tubes which is a compound based designed for a telescope.
This means that it’s got the benefits of not needing maintenance on a regular basis, it doesn’t suffer from chromatic aberration and the larger focal ratio and the SCT design also allows for the Evolution 8 to capture a lot more light than a Maksutov design
This ultimately makes it both a great telescope for observing deep space object and pretty solid at taking some solid pictures too.
Moving on to the specs, the evolution uses a 203mm aperture lens, 1500mm focal length resulting in a focal ratio of f/7.4. The size of its lens means that the power you’ll be able to exercise at its max theoretical magnification is 480x, which makes it a system that you’ll be able to observe a lot through.
With it you’ll be able to see a ton of nebulae, the major planets at pretty good detail, star clusters, galaxies so on and so forth. As for how great the pictures will turn out, they’ll be fairly average but you may occasionally capture some solid pics but, it will mostly be down to the post processing and other elements.
The accessories included in the evolution 8’s box are a stainless steel tripod, a single Fork Arm Altazimuth GoTo mount that has a rechargeable battery of up to 10 hours of runtime. The mount is of course a fully motorised and automated GoTo with a very large database objects, it’s also WiFi compatible.
The charging time for a full battery is around 4 to 8 hours (until the light stops blinking). The other accessories in the box includes two Plossl eyepieces at 40mm (50x) and 13mm (153x) of reasonably high quality,
As for the weight, it’s a actually very light at around 10kg, it’s dimensions are at 114 x 73 x 39 cm which makes it a relatively portable and I guess travel friendly device if that’s a feature you’d be interested in.
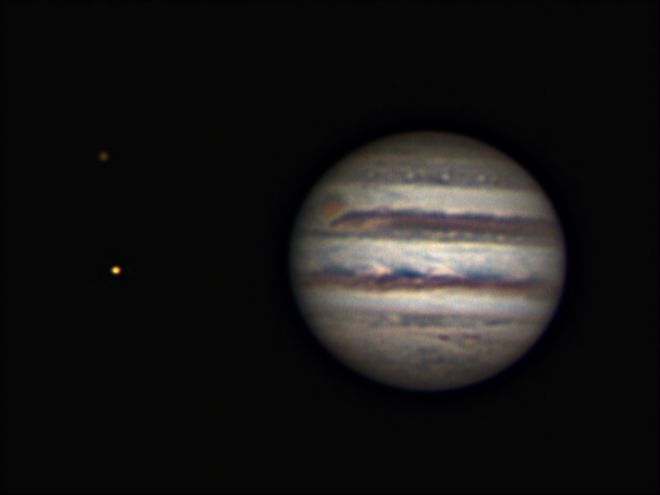
I know the evolution 8 is branded as a telescope not designed for astrophotography but, for what it offers it’s definitely a significantly better device to shoot Jupiter, saturn, Mars and the other planets due to its powers and judging from photos shown here it genuinely can produce some nice looking shots.
It definitely is very expensive, being in $2k range but, it’s a great balanced telescope.
Click Here To Check The Nexstar Evolution 8’s Best Price On Amazon!
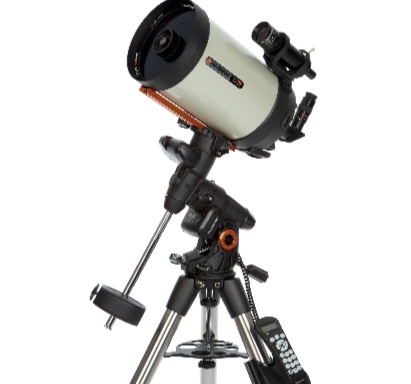
4. Celestron Advanced VX 8” Edge HD
Pros :
- Top class GoTo Mount provided
- SCT optics used making for more efficient light gathering
- Great specs
- Great accessories provided
- Takes great photos
Cons :
- Handles on the side aren’t great
- Expensive
- Really heavy
The Advanced VX 8 is another system by celestron and yet another expensive one setting you back around $2k – $2.5k if you’re in the market for one.
The telescope uses the Schmidt-Cassegrain (SCT) design meaning it’s a compound scope that’s able to gather light more efficiently than a Maksutov-Cassegrain, which is essential for capturing a great and smooth image from your scope to a DSLR.
VX8 in particular uses the top of the line SCT by celestron meaning it has much larger diffraction-limited field-of-view allowing for sharper images of stars. The design also means the tube is relatively compact and lightweight despite the power of the system itself.
As for the specs of the Advanced VX 8, you get a 203.2mm aperture lens, 2032mm focal length which results in a f/10 focal ratio.
These specs means that the VX8 is capable of a maximum magnification of roughly 480x. This means it’s a more than capable device at observing multiple deep space entities provided you have the right powered eyepieces for the job.
As for the accessories you’ll receive within the box, you’ll get a 9×50 finderscope, a 1.25″ Star Diagonal, a 40mm (51x) eyepiece, Celestron’s Starry Night Special Edition Software, SkyPortal App and the Computerized Equatorial Mount.
The mount also has a database of of 40k celestial objects that you can choose from and when chosen, the VX8 will automatically find it using it’s DC servo motors.
As for the weight of the device, it’s definitely heavy weighing around 27kg with the mount included however, it’s certainly possible to disassemble the kit making it a lot more manageable when you want to move it around and find better areas to take images from.
As for the quality of the images, they can be very nice looking. Users from amazon have taken some very pleasing shoots as can be seen below so, if you’ve got the right equipment and a great camera, taking some great shoots should be more than possible with the VX 8.


The VX8 is a very capable devices and although the price tag may be too much for some, it’s still a highly powerful telescope in general and a superb camera for astrophotography.
There are some issues regarding the handles being poorly placed and some issue with getting a faulty system but, this should be easily dealt with if you shop at celestron directly or through trustworthy retailers like amazon.
Click Here To Check The VX 8 Edge HD’s Best Price On Amazon!
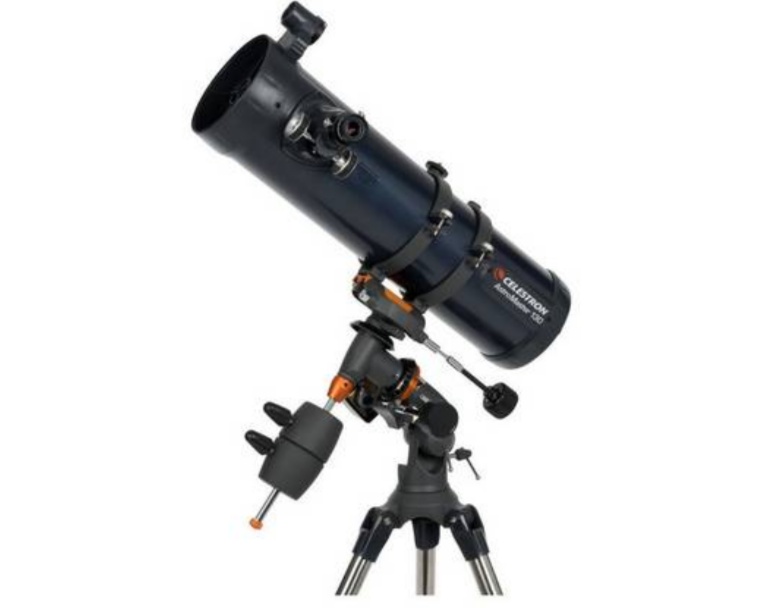
5. Celestron Astromaster 130EQ
Pros :
- An affordable device
- Decent specs
- Good amount of inbox accessories included
- Decent for astrophotography if you’re on a tight budget
Cons :
- Lot of maintenance required
- Uses a spherical mirror
- Subpar build quality
The Celestron Astromaster 130EQ is a great starter astrophotography scope if you manage to get a mount with a t-ring to attach your DSLR camera to.
However, as the scope isn’t primarily built for taking pictures, you shouldn’t expect the best results. Nevertheless, being only $150 – $200, it’s a significantly cheaper option than the other scopes on this list.
The astromaster’s specifications include a 130mm aperture, a 650mm focal length which leaves us with a f/5 focal ratio, which is a pretty standard specs list for the price.
This means you’ll be a able to achieve a 256x max theoretical magnification which translates to being able to see Jupiter and its moons, Saturn and its rings will also be visible, multiple star clusters, galaxies and nebulae will be visible through the scope at a decent detail level, provided you get the maximum power out of the astromaster.
The accessories included in the box are 2 eyepieces at 20mm (33x) and 10mm (65x), a finderscope, a tripod with a deluxe accessory tray, a DVD that shows a database of 10k objects and of course the German equitorial mount.
The accessories will only generally be useful for viewing the moons and maybe seeing a few planets, although not in much detail. This means that once again you will need to invest in some powerful eyepieces or a Barlow lens to get the best views with the astromaster 130EQ.
The device weighs in at 12kg with dimensions of 88.9 x 48.3 x 30.5 cm which makes it a fairly portable device if you’re planning on travelling with it.
As for how well it’ll do at taking pictures, I’d say that it’s limited to only taking images of the moon at a decent detail but, it definitely wouldn’t be good enough to produce a solid screensaver. Nevertheless, considering the Astromaster isn’t predominantly a astrophotography telescope, it is decent for what it offers.
Click Here To Check The Astromaster 130 EQ’s Best Price On Amazon!
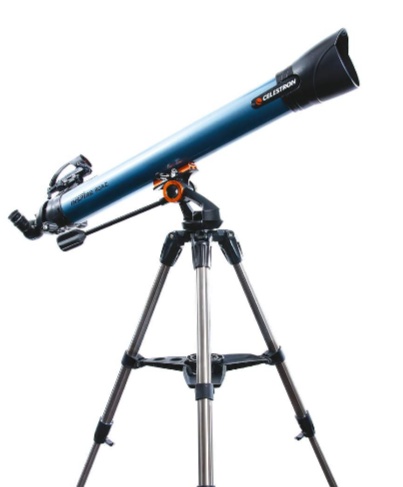
6. Celestron Inspire 80AZ Refractor
Pros :
- Very affordable
- Requires low maintenance
- Good for planetary viewing
- Good for kids looking into astrophotography
- Quite portable
Cons :
- Does suffer from chromatic aberration
- Mediocre accessories
The inspire 80AZ is another starter type telescope being roughly $150 and it also being a refractor scope does make it a lot easier for younger kids to get into astronomy and basic astrophotography.
The reason why it’s easy for younger individuals is purely because refractor scopes require less maintenance and re-alignment over cheaper reflector scopes because of the significantly sturdier builds. This also makes it a lot easier to take pictures.
The specifications are an 80mm aperture lens, 900mm focal length making a focal ratio of f/11.25. The higher focal ratio is generally ideal for systems that are designed for astrophotography and although this isn’t primarily the focus of the 80AZ, it does make it a little better for the job.
As for the max magnification of the device, it’s only around 157x so it’s not all that powerful but, with the right eyepieces, you should still be able to see multiple celestial entities such as planets, the Moon, star clusters and brighter deep sky objects like the Orion Nebula and Andromeda Galaxy.
The accessories you get with the scope includes 2 eyepieces at 20mm (45x) and 10mm (90x), a 90° erect image diagonal, an integrated smartphone adapter, a finderscope, and a red LED flashlight. You’ll also be provided with celestron’s starry night software which has a database of a fair share of objects you can learn about.
The eyepieces and finderscope aren’t generally the greatest out of the box, especially from the other offerings celestron provides but, it should be decent enough for viewing a few celestial objects. The scope is also fairly portable and lightweight with dimensions of 96.5 x 83.8 x 132.1 cm and the weight at a very light 7.7 kg
All in all, the inspire 80AZ is going to be a great scope for amateur photography of the moon and some blurry imagery of other brighter deep space objects but, with the added smartphone adapter, you won’t immediately need to fork out cash for other mounts to start taking snaps with this entry level telescope.
Click Here To Check The Inspire 80AZ’s Best Price On Amazon!
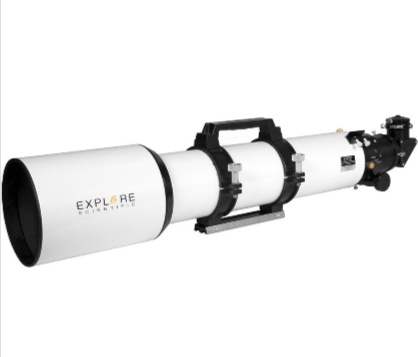
7. Explore Scientific ED127
Pros :
- Great specs
- Uses an APO Refractor lens which significantly reduces chromatic aberration
- Will be great for taking images of planets due to the narrower focal ratio
- Is built sturdily
- Won’t require regular maintenance and collimation
Cons :
- Does not come with a mount
- Is very expensive
- No eyepieces included in the box
This is the second highest astrophotography based scope by Explore Scientific just trailing behind the ED152, which I might add is in the region of $6k to purchase.
This device however is “cheaper” and will set you back $1.3k – $2k so it’s a fair bit more affordable than the ED152 but still a pricey bit of kit. The ED127 is a apochromatic refractor telescope meaning it’s designed in a way to reduce chromatic aberration, that is very much a problem most refractor telescopes face.
Moreover, as I’ve mentioned above a few times, refractor scopes also have the benefits of being sturdy devices that require minimal maintenance and tweaking for appropriate collimation. They can also act as spotting scopes per say, which isn’t the case with reflector devices.
The specifications of the ED127 includes a 127mm aperture lens, a focal length of 952mm resulting in a focal ratio of f/7.5.
As the scope is essentially a 5inch offering, the maximum magnification is also decent being 250x. This makes it a much more versatile scope than the smaller 72mm or 80mm scopes on this list.
This means you’ll be able to capture some decent images of jupiter and saturn with good detail and even images of the star clusters and nebulae can come out a bit sharper due to the 3x – 4x power over the other devices.
The ED127 comes with a fair few accessories too. This includes a Dew Shield, 2″ Diagonal, 1.25″ Eyepiece Adapter, dust Covers, Ten-to-One & Dual-Speed Focuser and a Universal Adjustable Mounting Plate.
The device is fairly portable with dimensions of 38.4 x 11.4 x 11.2 inches and weight of roughly 12kg. It definitely won’t be a nuisance to move around if that’s what you’re worried about.
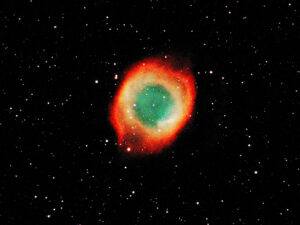
The accessories appear to be very solid according to users and the device as a whole has provided some of the most high quality astrophotography images that many users have ever experienced so, it’s a astrophotography partner that you definitely cannot go wrong with, provided you have all the necessary camera equipment and all.
Check the images out below to see just how good some photos can turn out.
Click Here To Check The Explore Scientific ED127’s Best Price On Amazon!
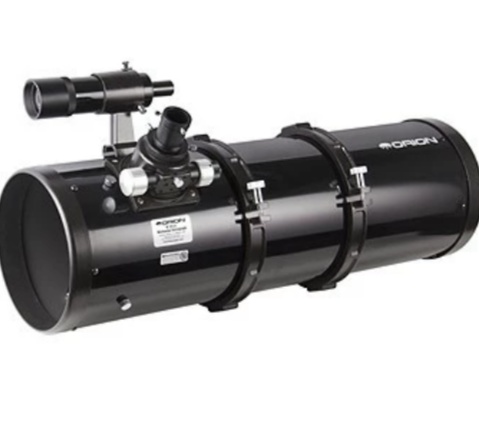
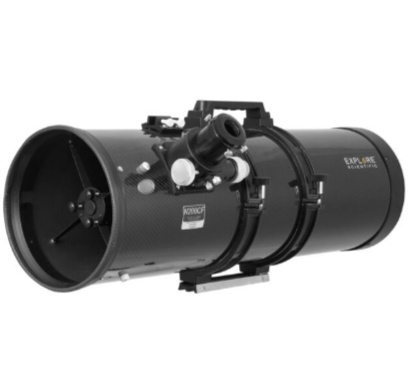
8. Orion 8” f/3.9 Newtonian Astrograph
Pros :
- Great specs
- Great for taking pictures and viewing faint objects like galaxies in space
- Wide focal ratio makes it ideal for wide space photography of stars
- Quite portable considering its 8″ aperture
Cons :
- Will require regular maintenance
- No mount provided
- Won’t be as good at taking planetary images
This astrophotography telescope is an entry level one that will set you back rough $475 – $550. This particular scope is a newtonian reflector system which is why it’s cheaper than the refractor counterparts but, this also means it comes with the issues a reflector telescope inherently has such as collimation being a pain, high maintenance, so on and so forth.
Obviously there are benefits to reflector system too such as being better at capturing faint deep space objects but I digress.
The Orion 8″ Newtonian Astrograph, as the name would suggest, has a 203mm aperture lens, and a 800mm focal length resulting in a focal ratio of f/3.9.
Because the focal ratio is so low, the system is able to capture photons a lot faster than the other options but, this also does mean the length of exposure isn’t going to be as long as other scopes. Then again the bigger lens does make this negative somewhat redundant as it brings in more light than most of the scopes on the list.
Nevertheless, considering the wide angle nature of the system, it might not be too much of a problem.
Generally speaking, newtonian reflectors aren’t the greatest for taking images as there isn’t enough inward focuser travel to allow cameras to focus well but, as this reflector is specifically designed for taking images, this issue is dealt with.
Still, the Orion 8″ is going to be a very capable device for just star gazing in general with its max magnification of 400x. You’ll be able to see all kinds of objects and take some great images of star clusters, nebulae and even closeups of planets (although inherently the field of view will be very wide).
The accessories included in the box are a 9×50 finderscope, a 2″ dual-speed Crayford focuser, a Pair of tube rings, Cooling fan, 2″ & 1.25″ extension adapters (this is so eyepieces can focus better for observing deep space due to the inward focuser travel), Collimation cap, User guide, Starry Night SE software.
The weight and dimensions of the device are 7.9kg and 90.4 x 48 x 43.4 cm so it’s obviously not the smallest device on this list but, it should be more than manageable to move around.
As you can see above, the the Orion 8″ Newtonian Astrograph does take some fine photos and although it does have the problems commonly associated with newtonian reflectors and you’ll also need to buy a mount (wouldn’t suggest a german equatorial mount because it’ll be awkward to look through the eyepiece) but, if you have all the equipment ready, taking some great astro images will only be a click away.
Click Here To Check The Orion 8 Astrograph’s Best Price On Amazon!
9. Orion 6” f/9 Ritchey-Chretien

Pros :
- Issues with coma and spherical aberration are nullified as a result of the RC optics
- Narrower focal ratio making it solid for planetary observation and picture taking
- Solid specs for the price
Cons :
- No eyepieces or finderscope included
- No mount included
The Orion is a Ritchey-Chretien based astrophotography telescope and will set you back around $500 if you decide to purchase it.
The RC design is a variant of cassegrain so it’s essentially a compound based telescope. The elements that defines a Ritchey-Chretien scope are that it’s designed to eliminate off-axis optical errors (otherwise known as coma) and spherical aberration. This in turn make the Orion a great telescope for viewing and taking images of wide angle deep space.
The specifications of this device are an aperture of 152mm, a focal length of 1370mm resulting in a focal ratio of f/9. As the focal ratio is large, it will make it tough to locate deep space entities but, it also means you’ll be able to capture more detailed and smoother images through the scope as you can expose the images for a longer period of time.
The specs also mean you’ll be able to see and observe upto a max magnification of 300x. This in turn will result in you capturing solid images of planet and bright deep space images but, the quality of observing them won’t be as detailed as the Orion 8″ newtonian Astrograph above (it’s still more than powerful enough for simple observations).
The accessories included in the box are a 2″ dual-speed Crayford focuser, Extension tube, 2″ length (x1) and the Starry Night SE astronomy software digital download.
The systems weight is around 5.5kg with dimensions of 19.1 x 8.4 x 8.4 inches making it a very portable astrophotography telescope, if that’s what you’re looking for.
However, the system doesn’t come with a mount or a finderscope so these are things you will need to consider purchasing nevertheless, the system is a great astrophotography kit at a fairly reasonable price.
Click Here To Check The Orion 6” f/9 Ritchey-Chretien’s Best Price On Amazon!
10. Orion 08296 10-Inch f/3.9 Newtonian Astrograph Reflector Telescope
Pros :
- Great specs for an astrophotography device
- Great for taking wide shots of space
- Reasonably lightweight considering the optical size
- Great for viewing and taking images of faint objects
Cons :
- No eyepieces or mount included in the box
- Will require more maintenance as it is a reflector device
This is an upgraded variant of the 8″ Newtonian Astrograph, mostly on the aperture lens but, the general scope is more or less the same. As it is a Newtonian reflector, along with its small focal ratio relative to the specs, the Orion 10″ will be a lot more hands on than a refractor or Cassegrain designed scopes.
You will need to collimate pretty much every time you bring it out and you’ll also need to keep it clean and maintained as the optics are still exposed. The system also doesn’t come with a mount meaning although the $700 – $800 for the telescope scope is a decent price, you will need to invest a further $400 to $2k (if you want a high end mount) for the best experience.
If you want to go cheap you could also go with a tripod but again, for the best experience a good mount is crucial.
The specs of this Orion Newtonian Reflector is a 254mm aperture lens, a focal length of 1000mm which of course results in a focal ratio of f/3.9.
This means much like the less powerful variant, the images cannot be exposed for too long but, because of the larger aperture lens the amount of light captured per second is still good enough to produce some highly detailed imagery, in this case more detailed than the 8″ variant.
You’ll also be able to observe objects at more detail too, with the right equipment of course, as this device has a max usable magnification of 500x.
Once again the issue regarding not enough inward focus is fixed and the eyepiece issue is also resolved through the adapters provided in the box.
Speaking of the items included in the box, you’ll receive a 9×50 finderscope, a 2″ dual-speed Crayford focuser, a Pair of tube rings, Cooling fan and a 2″ & 1.25″ extension adapters.
The device is fairly lightweight weighing only 11.6kg with dimensions at 105.4 x 48.9 x 47 cm, which makes it relatively portable but not so small that it could easily fit into your backpack.
The scope is simply just a better version of the 8″ variant and unsurprisingly it can take some great photos.

Most users of the device have genuinely enjoyed it and although it does require collimation every time you bring it out, when you’ve sorted everything out, have a great camera, mount and are in a place with minimal light pollution, the shots you’ll be able to take can be, simply put, breathtaking.
Click Here To Check The Orion 10-Inch f/3.9 Newtonian Astrograph’s Best Price On Amazon!
Click Here For Orion’s Official Pricing!
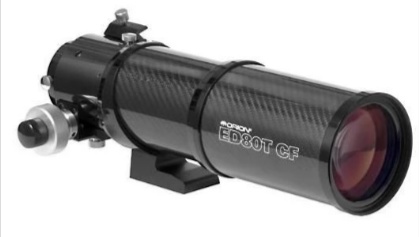
11. Orion 9534 ED80T CF Triplet Apochromatic Refractor Telescope
Pros :
- Uses the superior APO refractor optics
- Does not suffer from chromatic aberration
- Very portable
- Great for planetary and wide field photography
- Sturdily built
- Will require minimal maintenance
Cons :
- Specs are a little lacklustre for the price
- No mount included
- Lack of in box accessories
This astrophotography telescope is yet another 80mm refractor that’s using the Apochromatic design which of course helps in reducing spherical and chromatic aberration when taking photos. It’s also one of the more expensive systems on this list costing around $900 – $1k for the tube alone, as for a mount, that’s another expenditure that you’ll need to look into.
The specification of the ED80T are an aperture lens of 80mm, a focal length of 480mm which leaves you with a moderately fast f/6 focal ratio. The lower focal length also means the images will come out a little wide whilst the 80mm lens means it won’t be the most powerful device on the market with a 160x max magnification.
Nevertheless, this doesn’t mean you won’t be able to capture great images of star clusters, galaxies and the bigger planets, although once again the smaller magnification power does mean planetary images won’t be the most detailed. The ED80T is much better for taking images of the vast expanse of space as opposed to of singular entities.
The accessories that come with the scope are a 2″ dual-speed Crayford, Dovetail base for finder scope and Custom foam-lined hard carrying case.
The device is also very portable weighing in at 4.73kg with dimensions at 46.2 x 29 x 21.6 cm. This isn’t taking into account the size and weight of the mount but, there’s no denying the devices portability.
Users of the system have found some issues with it such as a the screw for the dew shield not being great and dust being caught in the lens (which is not something you want happening). But, all in all users of the ED80T have found it to be great, the focuser, the portability and the image quality.
As you can see above, if you buy the right camera and use decent software, taking beautiful pictures with the ED80T is more than possible!
Click Here To Check The Orion ED80T CF’s Best Price On Amazon!
Click Here For Orion’s Official Pricing!
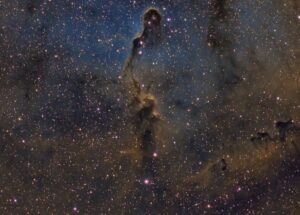
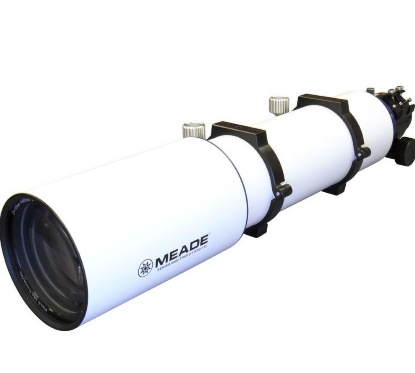
12. Meade Series 6000 115mm Triplet APO
Pros :
- Will require minimal maintenance
- Uses the superior APO refractor optics
- Won’t suffer from chromatic aberration
- Will take great images with true colour rendition
- Very portable
Cons :
- Is very expensive
- No included mount
- Subpar inbox accessories
The meade 115mm is near enough a top of the line astrophotography telescope considering it has a price tag of around $1.7k – $2.3k depending on where you shop.
It’s a refractor that uses apochromatic lens which means it’s a very sturdy build that doesn’t require you to collimate it all that often and even has little to no spherical and chromatic aberration unlike the achromatic lens that most refractors use.
The triplet aspect of the lens also makes it great for true colour rendition without distortion across the entire field of view when taking photos.
As for the specs, this system has a 115mm aperture lens, a focal length of 805mm resulting in a pretty fast f/7 focal ratio. The aperture being 115mm is much larger than the majority of the strictly astrophotography telescopes in this list meaning it’ll be a pretty solid for taking decent images of some planets with the max magnification of 226x.
Of course, what the scope will shine at most is taking wide field images of outer space star clusters and galaxies and with its Triplet APO lens, the accurate colours will produce mesmerising images.
The accessories included in the box are a carrying case and a 2.5″ Dual-Speed 10:1 Rack & Pinion Focuser. The systems dimensions and weight also make the meade a highly portable device withe the dimensions being 5.5 x 4.5 x 12.5 inches with the weight being a light 5.5kg.
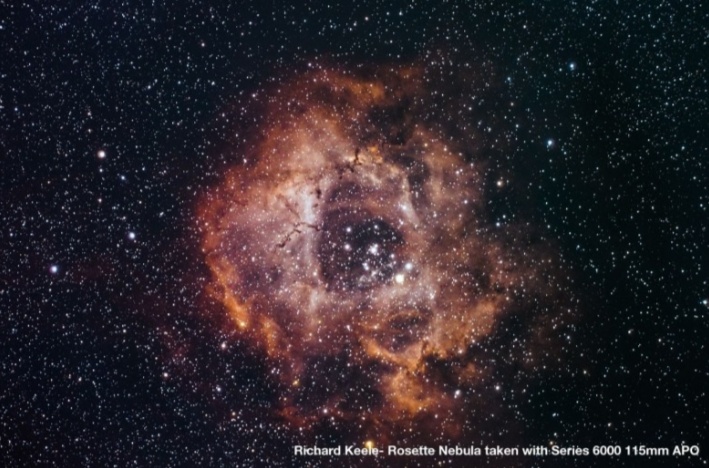
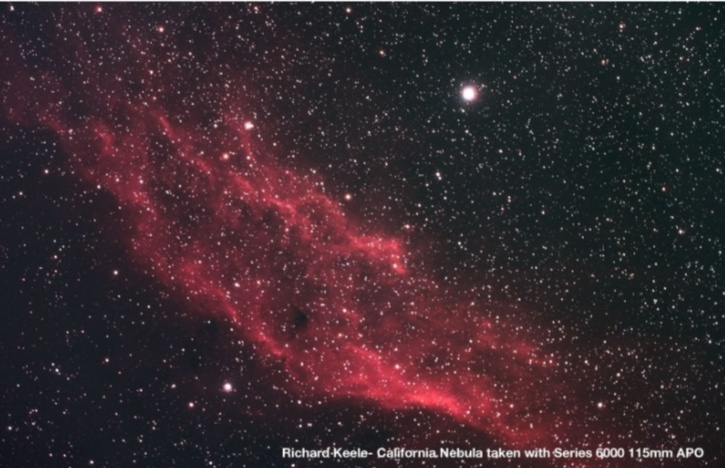
As is to be expected the images the Meade 6000 115mm can take are brilliant so, it is most definitely a high quality system provided you know how to take photos and have the necessary equipment to do so.
Click Here To Check The Meade Series 6000 115’s Best Price On Amazon!
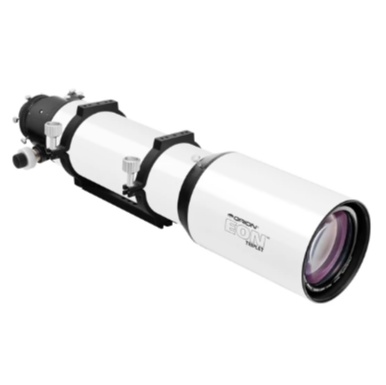
13. Orion 09565 EON 130mm ED Triplet Apochromatic Refractor
Pros :
- Requires minimal maintenance
- Will suffer from minimal chromatic aberration due to the APO optics
- Will render true colour images without distortion
- Great for take images of planets as a result of the narrower focal ratio
Cons :
- Does not come with a mount
- Not enough accessories provided inbox
- Is very expensive
This is another highly expensive top of the line astrophotography telescope that’ll set you back in the region of $3k – $3.5k so it’s certainly not cheap, then again quality never does come at an affordable price.
The system also uses a triplet APO refractor lens so it fixes a lot of the basic refractor issues of spherical and chromatic aberration whilst also producing true colour renditions without distortion across the entire field of view when taking photos.
The EON 130’s specs are fairly decent too with a 130mm aperture lens, a focal length of 910mm which means you’ll get a pretty fast lens at f/7 focal ratio. The bigger aperture also has better detailed planetary images with a max magnification of 256x.
The lens will be able to take images of a plethora of celestial objects, everything from the moon to a bunch of star clusters and nebulae, constellations and so on.
The accessories within the box are a 3 inch dual-speed (11:1) Crayford focuser, two split-clamp tube rings and a triple-latch hard case. The hard case is a very nice touch and will allow you to keep your device safe but, as you won’t get any eyepieces or a mount with the EON 130, you’ll need to make another investment (A pretty heavy one at that) if you decide to pick this device up.
The device is also very portable having dimensions and weight at a very manageable 32 x 5.1 x 5.1 inches and 10.1kg.
The EON is high end astrophotography device so it shouldn’t come as a surprise the images you can take through it will be pretty darn good, of course the lack of a mount is a bit of bummer but, if you’re looking at telescopes at this section of the market, it’s inevitable that you’ll need to be willing to invest a lot more on the important things right?
The images you can take with the EON are certainly spectacular and the increased magnification to capture detailed images of certain planets will inevitably be the decider, at least in my eyes, for why you would opt for this over the cheaper scopes with the smaller lenses.
Click Here To Check The Orion EON 130mm ED’s Best Price On Amazon!
Click Here To Check Orion’s Official Pricing!
What Is The Difference Between Apochromatic And Achromatic Telescopes?
You’ve seen me use the term Apochromatic (APO) a bunch throughout the review right and admittedly it can be a little confusing when deciding on whether you should stick with an achromatic lens or opt for a telescope more focused in astrophotography with an APO lens.
To put it simply, a APO lens essentially corrects a lot of the issues that Achromatic lenses tend to have such as spherical and chromatic aberration. This isn’t a problem that’s ideal for taking photos because it could cause colour fringing in images that you take.
APO lenses also produce much crisper looking images, which is certainly something I’m sure you’d want from your astrophotography set up. That’s why APO lenses hike the price up for a telescope but, I’d say it’s a price worth paying for a better astrophotography experience.
Other Equipment That You’ll Need
As you know besides just the telescope, in order to capture the best images, good quality equipment is essential for the best results. In this section I’ll explain what other equipment you’ll need to research and invest in to produce the best astrophotography results you can.
Camera
The camera is easily the most important piece of equipment behind the telescope itself. Without a good quality camera, the images you take won’t be the best of quality, then again if you’re simply in this photography gig for hobby, a simple smartphone or point and shoot camera should be more than able to provide decent looking shots when hooked in using an adapter.
If you’re thinking of producing much better quality images a dslr should also do the trick. However, if you’re after the most professional looking shots, a CCD camera is what would be recommended.
Although a high quality camera can high quality images, it’s in the post processing phase that will make or break the beauty of an image taken. This means that if you’re great at colour correction and other elements of post production, even a smartphone camera will be able to produce amazing looking photos.
Mount
In order to place your DSLR camera and telescope in a mechanism that’ll hold it sturdily in place, an equatorial mount will be essential. This could cost you thousands on top of the initial fee for the telescope itself.
A highly recommended mount for beginner astrophotographers is the Celestron AVX which can cost around the region of $1k.
I’m sure can see now how expensive this hobby can be so, I’d seriously recommend you be somewhat serious about astrophotography before you splurge the cash on a telescope, mount and a good quality camera.
T Ring Adapter
This equipment is needed so you can attach your camera to the telescope. They tend not to be very expensive so I guess you could say that’s a good thing right.
Dew Shield
If your telescope doesn’t come with one of these, considering most astrophotography activity will be done at night, there’s always the possibility that the lens could get excessive moisture on it, maybe due to the humidity in the air or a light drizzle. A dew shield protects the lens from moisture caused as a result of dew.
They’re also relatively inexpensive, more so for telescopes with smaller lenses but, they’re definitely no where near the price of a mount.
Remote Timer Shutter
This is so you can prevent any kind of shaking when attempting to take an image. With a remote control you’ll be able to use a delayed timer which in turn won’t cause the set up to shake and in turn creating mediocre to poor final results.
Field Flattners
Field Flattners are used to fix the weird elongation of stars you get at the edge of the field of view using a refractor system. This isn’t necessarily the biggest of concerns when taking photos but, if you’re looking to produce clean looking images a field flattner is certainly equipment you should invest in.
Do keep in mind that Ritchey-Chretien scopes don’t suffer from this issue much.
Coma Corrector
If you have a fast newtonian reflector telescope (in this list it’d be the f/3.9 systems) a coma corrector is a must. What this tool does is correct the fuzzy edges of the images you take which means you’d need to crop the photos you take for a cleaner image.
Software
Software plays a key role in the quality of images your set up produces. Generally speaking when taking images of space, your camera will be utilising an exposure range of aroun 15 – 120 seconds and stacking these exposed images on top of each other.
In order to accomplish this task of stacking images you will need a specific software and a software universally recommended for astrophotography beginners is DeepSkyStacker. DSS allows you to do stacking, basic image processing and calibrating frames to allow for some good results.
The Basics Of Astrophotography
Astrophotography is a fairly complex task, especially for beginners, because you need to deal with software, cameras and even power supplies in some cases. In short it just requires quite a bit of man management which is a lot different to just using a telescope to observe stars.
In this section I’ll outline a few tips you should take note of if you’re a beginner getting into astrophotography.
Stability
Stability is very crucial when taking an image because even slight movement can mess up your image. That’s why a remote time shutter is highly recommended as it allows you to put a delayed timer before the camera starts shooting so you don’t have to touch anything after you’ve positioned your mount and camera.
Location
This is yet another crucial element when it comes to astrophotography. When taking images you want to be where the skies are clear and where light pollution is minimal, you also want to take photos where you can see a lot of the sky which isn’t distracted by houses taking up part of the frame.
Your field of view is determined by the focal length of your telescope and the camera you use to take pictures with.
Be Aware Of The Sky
As a beginner, the easiest thing you’ll be able to find and picture (at least a celestial object you know the name of) is the moon and as great as taking pictures of the moon can be, I’m sure you’ll also want to try capturing other celestial entities but without a clear sky that won’t be possible right.
So, If you want to capture images of more than just the moon, you should consider downloading an app to assist you in your astrophotography projects. A great app to look into is “scope nights” as it’ll provide knowledge about the skies, the weather, the clearest skies in your local area and so on.
This will allow you to find areas in which you can take your best pictures.
ISO Settings
The ISO is one part of the 3 elements within the exposure triangle (the other two are aperture and shutter speed). The ISO settings will determine how much noise your image will have whilst the others determine the field of view of your image and the amount of blur the photo will have.
That’s just the basic elements to the ISO but if you’re after a super detailed look on how to set this up to the best it can be, check out this guide.
Conclusion
A high quality and capable astrophotography system requires a lot of time and money to produce the best results for yourself. As with everything, even if the telescope is great and the set up is great, if you’re awful at taking pictures, the results will mimic that result so, as much as astrophotography is reliant on the equipment you have, it’s equally reliant on your ability to take images too.
If you’re a beginner, hopefully this list and guide has helped you somewhat in deciding what telescope you should go for and hopefully it finally kick starts your outer space photography endeavours, if you haven’t started already.
A Recap Of Our 3 Favourites!
